top of page
/Carbuncle Walkthrough
Walk-through on the creation of Carbuncle from Final Fantasy VIII.
Final Fantasy VIII is my favorite game of all time! It be obvious if you have been following me for a while or looked through my portfolio.
This was my first time creating a plushie of any sorta aside from the basic Dangos I use to make from CLANNAD.
While there may be an easier way to create a plushie. This is just how I created Carbuncle. 🙃


To get any sort of pattern I first had to create a 3-D version of Carbuncle. It was created using junk-mail and tape.

Took some time to build up and get the shape of each piece including the ears.


I struggled a bit at first on how I wanted to create the patterns for Carbuncle. I started to use scrap fabric to create my patterns at first. I realized this method was just going to be a headache.


I decided to use duct-tape instead to get the patterns. I had to cover everything in plastic first then duct-tape. For this I just used plastic grocery bags. I drew on the patterns with sharpie.
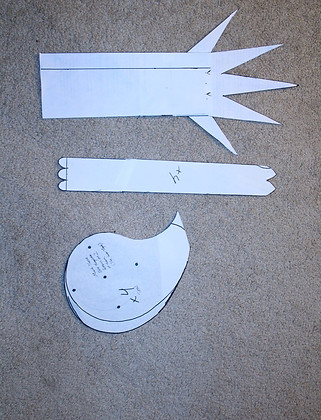


I transfered all the patterns to paper. Some things like the tail I was able to just create a paper pattern without needing to create a 3-D rendition.


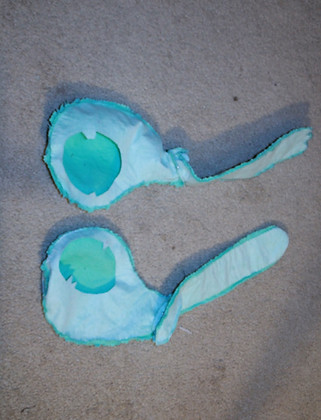
Here is a general example of how all the pieces were created. I picked fabric based on color. It was not the best fabric choice because it frays easily but it was the perfect color! Kint and jersey fabrics are what I highly recommended for creating a plushie because they do not fray. I used a nice thin interacting to line every pieces so that once it was stuffed it would look more smooth. So small detail spots like the toes I decided to hand-stitch.

All the pieces were marked with notches when I was creating the patterns. That way the curved lines will match up. It looks messy now but once sewn together it will look more like Carbuncle.


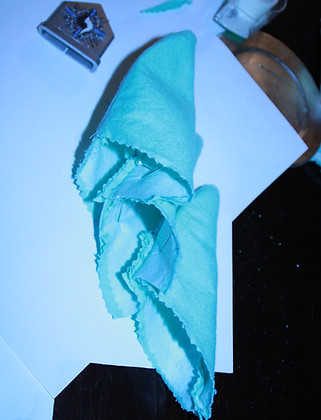
Now to carefully sew everything together until I had a head-less skin. Some pieces took a few tries to get correct. Particularly the legs, at one point Carbuncle looked more like a Thanksgiving turkey! 😂


The head was a huge challenge since there was so much going on. Had to get the ear on, head spikes, and side cheeks. Also for the head to not be so heavy so that Carbuncle can still stand up-right. A lot of hand stitching was required for the head spikes.

Now I have the head and the body stuffed! still have to hand-sew some parts and add on details like the ears.

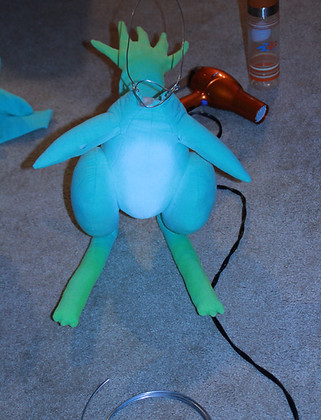

Did some test with some airbrushing for coloring. Now that a wireframe is added he can finally stand! Also bending some parts into shape.

Created the gem from sculpey. Did a mold from that and a colored resin cast. I added in a LED into his head so that the gem does glow.
He is able to stand up-right for the most part! It was a lot of work to do in the short amount of time I had. It's not perfect but for a first time go I think he looks good.


bottom of page